View and export form records
Every time someone submits your form, a new record appears. This page shows how to read, filter, export and import them.
Open the records
- Click Custom Forms in the top menu.
- Open the form's Options menu and choose View Responses & Results.
Three ways to look at records
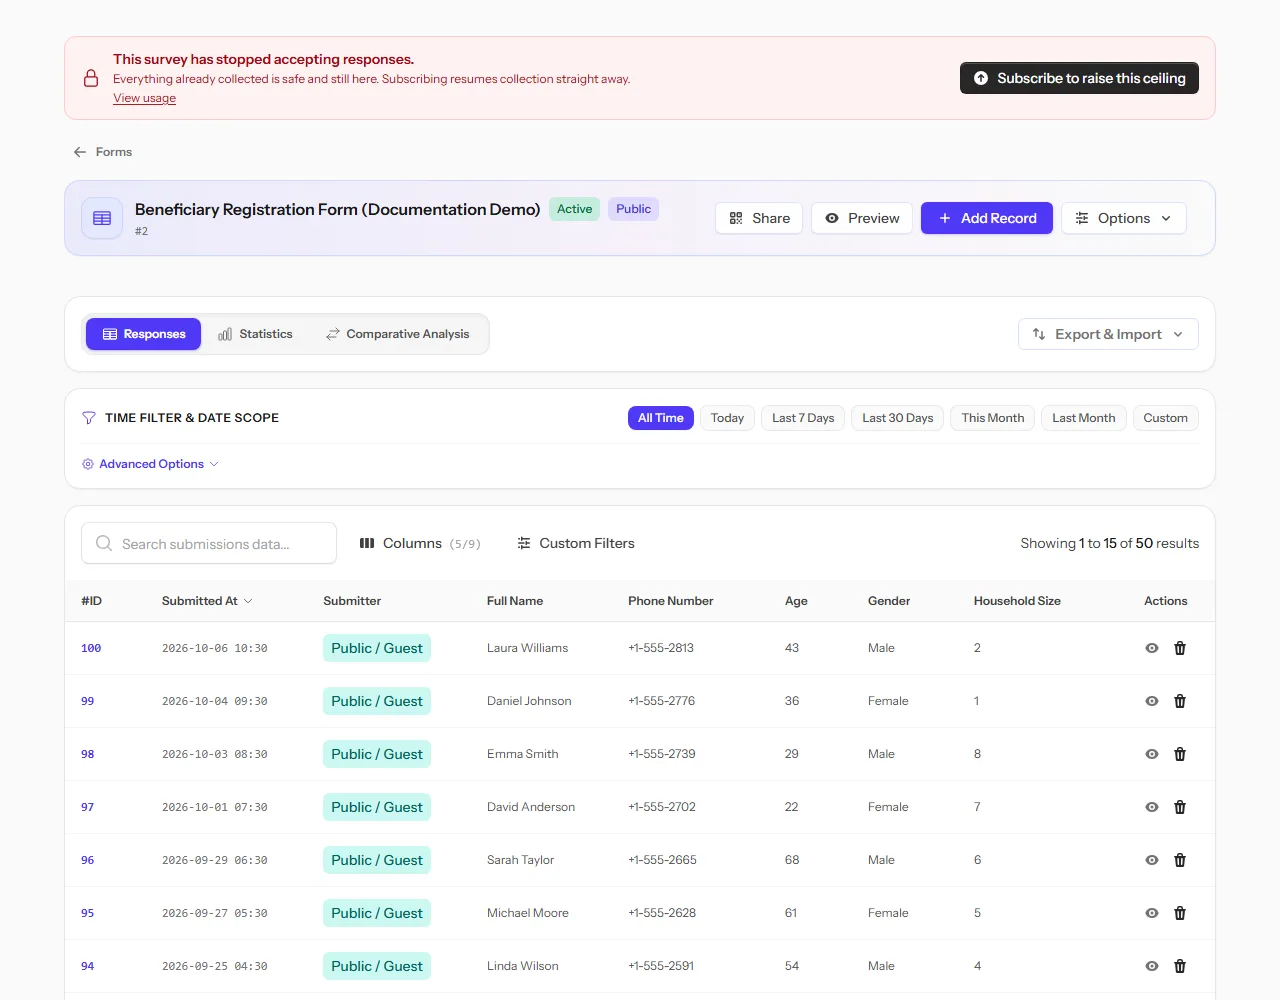
- Responses: one row per record. Use it to check and correct records, and to export them.
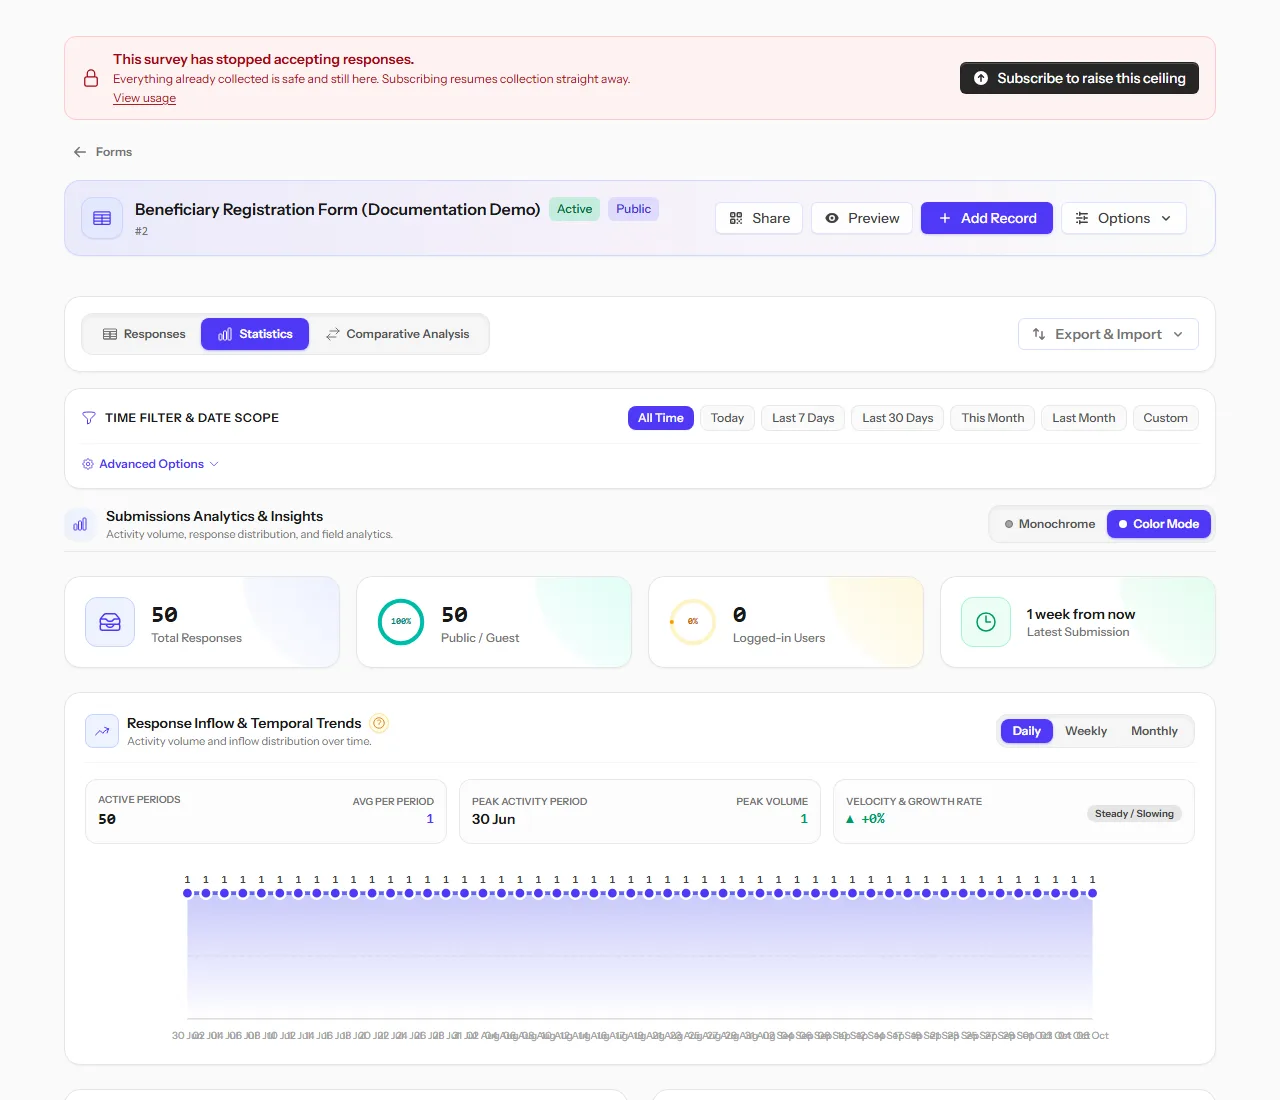
- Statistics: the overall picture, with counts and trends for each field.
- Comparative Analysis: one field against another.
Find what you need
- Search across all records.
- Choose a date range, such as the last 7 days or this month, under Time Filter & Date Scope.
- Add Custom Filters on any field.
Click Columns to pick which fields appear in the table. Hidden columns are still kept, and still exported.
Tip If the table looks emptier than expected, check the date filter first.
Records from field collectors {#field-records}
Click a record to open its details. A record sent from the Collect app can show three extra things:
- Respondent Name / ID and Location / GPS, when the form's Respondent Name and Location (Field App) setting is on. See Form settings.
- Field Collector Notes: whatever the collector wrote in the notes box. It is always kept, and line breaks are preserved.
Answers that don't fit the pattern {#format-check}
Fields with a pattern are checked strictly on the public link and when importing, but not in the Collect app. A field collector's answer that doesn't fit its pattern is therefore kept and counted like any other, and marked so you can find it:
- In a record's details, the field shows Does not match the expected format.
- Open Custom Filters and set Format check to Only records that do not match to list just those records.
- The CSV export has a last column, Format Check, naming the fields concerned.
If you later add, change or remove a field's pattern, the marks are updated for every field-collected record of that form.
Tip Review the marked records for typing mistakes, such as a phone number missing a digit, and follow up with the collector. The records are never rejected or hidden on their own.
Time Filter & Date Scope
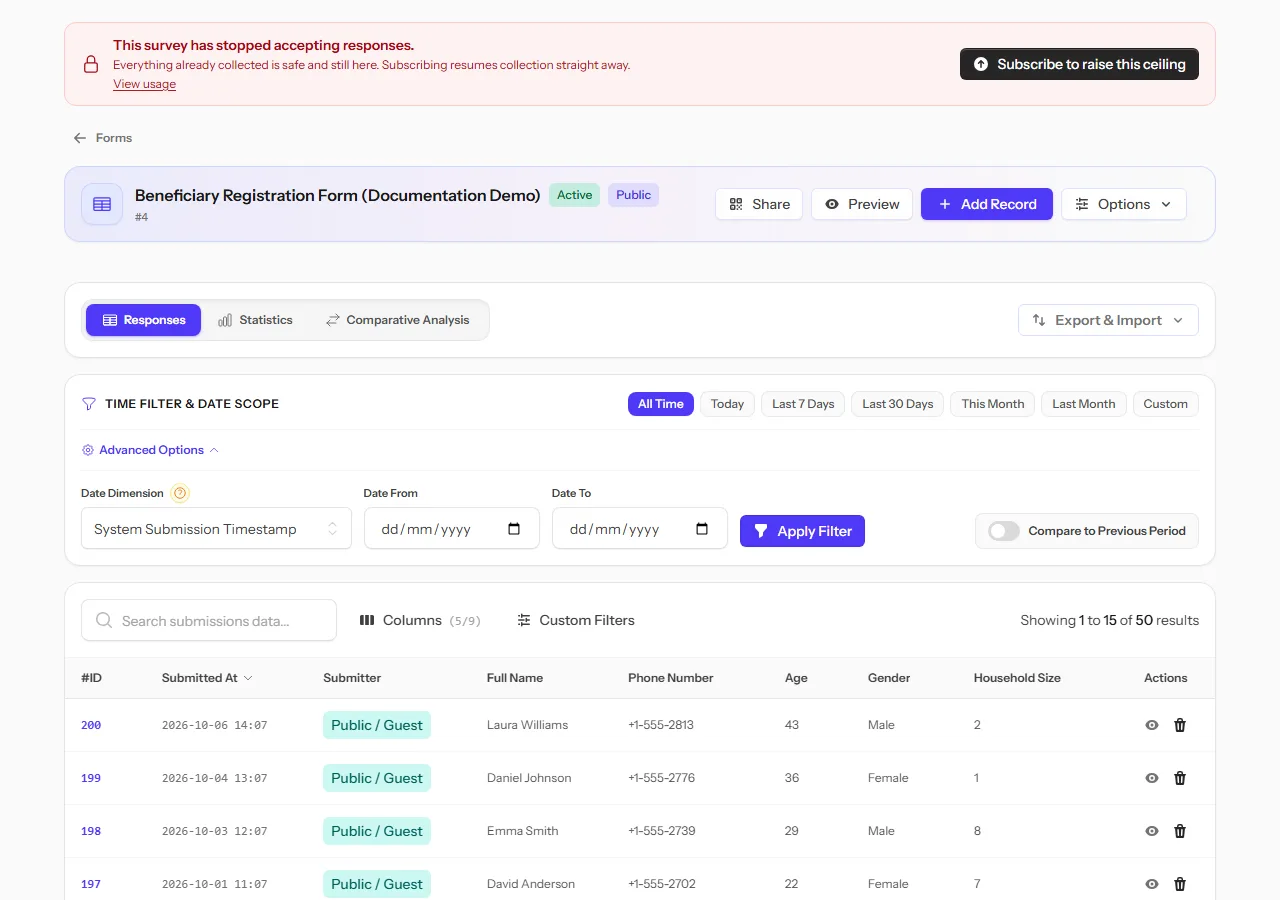
Above the table, Time Filter & Date Scope offers quick presets — Today, Last 7 Days, Last 30 Days, This Month, Last Month — or Custom for a specific range. Click Advanced Options to also choose:
- Date Dimension: which date the filter applies to. This can be the System Submission Timestamp (when the record arrived), or any Date field your form itself has, such as a Registration Date. Filtering by a field's own date answers "how many people registered last month," which is a different question from "how many records were submitted last month."
- Date From / Date To: the exact boundaries of a custom range.
This same time filter applies everywhere on the page: the records table, the Statistics view, and Comparative Analysis all respect it.
Comparative Analysis (crosstab)
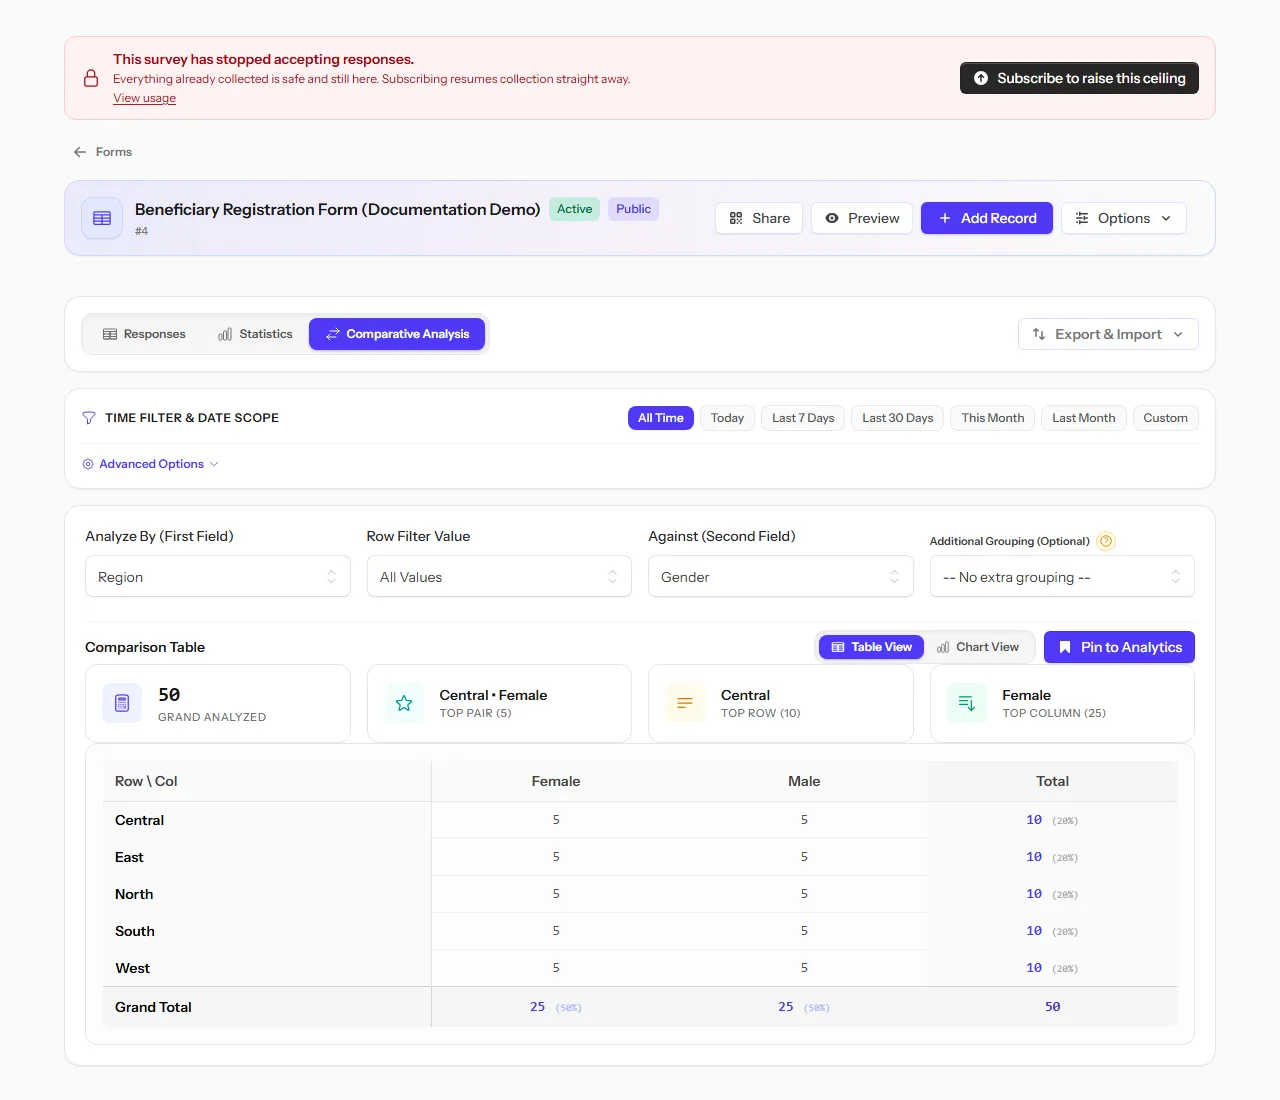
Click the Comparative Analysis tab to cross-tabulate two fields against each other:
- Choose a field under Analyze By (First Field) — this becomes the table's rows.
- Choose a field under Against (Second Field) — this becomes the columns.
- Optionally, choose a third field under Additional Grouping to split the result into separate tables, one per value of that field.
- Optionally, restrict a row's value with Row Filter Value.
The Comparison Table shows a count (and percentage) for every combination, plus row and column totals, and highlights the top pair, top row and top column. Switch between Table View and Chart View with the buttons above the table.
Note Unlike the survey crosstab, the form's Comparative Analysis shows counts only. It doesn't run a chi-square test or report statistical significance — it's built for exploring your records, not for a peer-reviewed result.
Pin a crosstab to the dashboard {#pin-to-analytics}
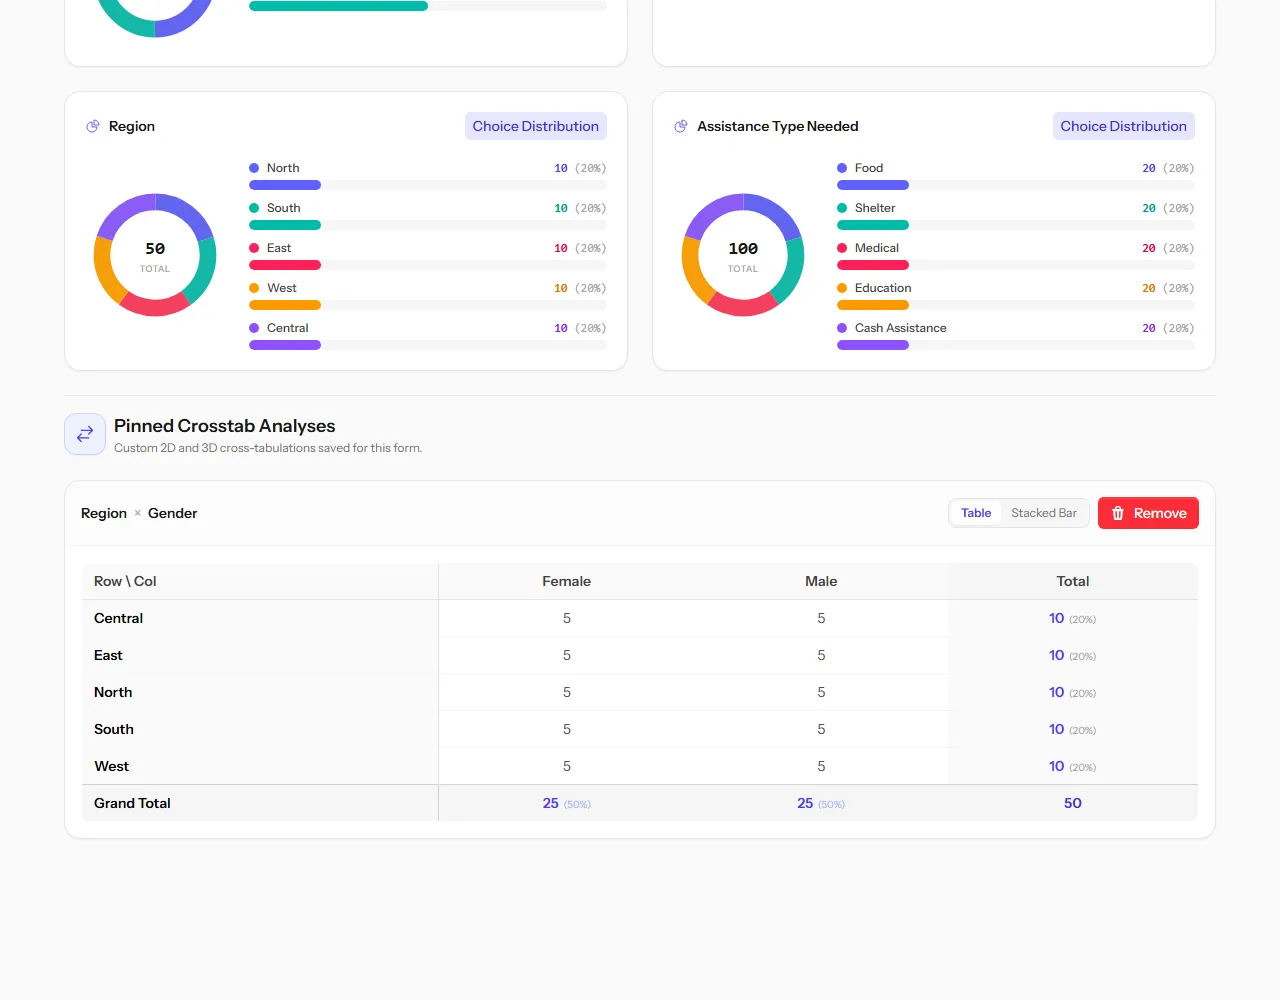
Once a Comparative Analysis is set up the way you want it, click Pin to Analytics. It then appears every time you open the Statistics tab, under Pinned Crosstab Analyses, recalculated with your latest records — so you get a permanent view of, say, "Region against Gender," without rebuilding it each visit. Click Remove on a pinned crosstab to unpin it.
Export
Under Export & Import:
- Export CSV: the records as a spreadsheet. After your form's own fields it adds Respondent Name / ID, Location / GPS, Field Collector Notes and Format Check columns, empty for records that have nothing to show.
- Export Analytics to PDF: the charts as shown.
Warning An export includes only what's currently shown. If a filter is on, the file contains only the filtered records. Clear your filters before exporting everything.
Import records
To add many records at once from a spreadsheet:
- Under Export & Import, choose Import Submissions (CSV).
- Download the template, which has the right column names for this form.
- Fill it in and upload it. The file must be
.csv, and no larger than 10 MB.
Each row is checked against your fields before anything is saved, and you'll see which rows failed and why. Imported records count against your limits like any others.